
| 일 | 월 | 화 | 수 | 목 | 금 | 토 |
|---|---|---|---|---|---|---|
| 1 | 2 | 3 | ||||
| 4 | 5 | 6 | 7 | 8 | 9 | 10 |
| 11 | 12 | 13 | 14 | 15 | 16 | 17 |
| 18 | 19 | 20 | 21 | 22 | 23 | 24 |
| 25 | 26 | 27 | 28 | 29 | 30 | 31 |
- 재귀함수
- pytorch
- BFS
- AI
- LSTM
- 계수정렬
- DFS
- 그리디
- RESNET
- GRU
- 스택
- 인공지능
- 큐
- 다이나믹 프로그래밍
- 캐치카페신촌점 #캐치카페 #카페대관 #대학생 #진학사 #취준생
- 딥러닝
- 선형대수
- rnn
- Machine Learning
- 알고리즘
- 삽입정렬
- 머신러닝
- 퀵정렬
- 최단 경로
- 정렬
- 선택정렬
- 이진 탐색
- Today
- Total
hyeonzzz's Tech Blog
CNN-RNN 아키텍처를 이용한 비디오 분류 본문
▶ CNN-RNN 아키텍처
※CNN(Convolutional Neural Network)
: 입력 데이터에서 특징을 추출하는 데 뛰어난 성능을 보인다
CNN은 Convolution layer와 Pooling layer로 구성되어 있다. Convolution layer은 입력 데이터를 필터와 합성곱 연산을 수행하여 feature map을 생성한다. Pooling layer은 feature map의 크기를 줄인다. CNN은 Convolution layer와 Pooling layer을 여러 층으로 쌓아 깊은 구조를 형성하며, 이를 통해 복잡한 시각적 특징을 학습할 수 있다
※RNN(Recurrent Neural Network)
: 입력 데이터의 순서를 고려하여 처리하는 데 특화되어 있다
RNN은 과거의 입력과 현재의 입력에 따라 현재의 출력을 예측하는 반복적인 구조를 가지고 있다. 이를 통해 시간적인 의존성을 모델링하고, 문맥 정보를 유지하며 예측을 수행할 수 있다
※CNN-RNN 아키텍처
: 시퀀스 데이터에 대한 특징 추출과 시간적인 의존성 모델링을 동시에 수행하여 높은 성능을 보인다
CNN-RNN 아키텍처는 입력 데이터에서 시각적인 특징을 추출하는 데 CNN을 사용하고, 추출된 특징을 시계열적인 정보와 연관시켜 시퀀스로 처리하는 데 RNN을 사용한다.
우리의 목적 : 블랙박스 영상으로 차량 사고 케이스 분류하기
영상은 프레임과 시퀀스로 구성된다
프레임 - 공간 정보
시퀀스 - 시간 정보
프레임과 시퀀스 두 가지를 모두 모델링하기 위해
CNN과 GRU 레이어로 구성된 RNN이 합쳐진 하이브리드 아키텍처(CNN-RNN)를 사용하였다!
▶ CNN-RNN 이용한 비디오 분류 구현
1. tensorflow 패키지 가져오기
!pip install -q git+https://github.com/tensorflow/docs
TensorFlow 2.5 이상이 필요하다
2. 구글 드라이브 연결
from google.colab import drive
drive.mount('/content/drive')
3. 라이브러리 import
from tensorflow_docs.vis import embed
from tensorflow import keras
from imutils import paths

import matplotlib.pyplot as plt
import tensorflow as tf
import pandas as pd
import numpy as np
import imageio
import cv2
import os
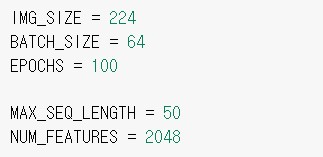
4. 하이퍼파라미터 정의
IMG_SIZE = 224
BATCH_SIZE = 64
EPOCHS = 100

MAX_SEQ_LENGTH = 50
NUM_FEATURES = 2048
5. 라벨링이 되어있는 csv 파일 & 샘플 출력
train_df = pd.read_csv("/content/drive/MyDrive/ColabNotebooks/train.csv")
test_df = pd.read_csv("/content/drive/MyDrive/ColabNotebooks/test.csv")

print(f"Total videos for training: {len(train_df)}")
print(f"Total videos for testing: {len(test_df)}")

#10개의 샘플 출력
train_df.sample(10)
6. 영상에서 프레임 추출
def crop_center_square(frame):
    y, x = frame.shape[0:2]
    min_dim = min(y, x)
    start_x = (x // 2) - (min_dim // 2)
    start_y = (y // 2) - (min_dim // 2)
    return frame[start_y : start_y + min_dim, start_x : start_x + min_dim]


def load_video(path, max_frames=0, resize=(IMG_SIZE, IMG_SIZE)):
    cap = cv2.VideoCapture(path)
    frames = []
    try:
        while True:
            ret, frame = cap.read()
            if not ret:
                break
            frame = crop_center_square(frame)
            frame = cv2.resize(frame, resize)
            frame = frame[:, :, [2, 1, 0]]
            frames.append(frame)

            if len(frames) == max_frames:
                break
    finally:
        cap.release()
    return np.array(frames)
앞에서 말한 것처럼 영상 = 순서가 지정된 프레임 시퀀스
이므로 프레임을 추출하여 3D 텐서에 넣는다!
-> 방법 : 최대 프레임 수에 도달할 때까지 고정된 간격으로 비디오 프레임을 저장함
7. Inception V3모델 사용
def build_feature_extractor():
    feature_extractor = keras.applications.InceptionV3(
        weights="imagenet",
        include_top=False,
        pooling="avg",
        input_shape=(IMG_SIZE, IMG_SIZE, 3),
    )
    preprocess_input = keras.applications.inception_v3.preprocess_input

    inputs = keras.Input((IMG_SIZE, IMG_SIZE, 3))
    preprocessed = preprocess_input(inputs)

    outputs = feature_extractor(preprocessed)
    return keras.Model(inputs, outputs, name="feature_extractor")


feature_extractor = build_feature_extractor()
사전 훈련된 네트워크 통해 추출된 프레임에서 의미 있는 특징을 추출한다
여기서는 InceptionV3 모델 사용하였음!
8. 라벨 추출
vocabulary = np.unique(train_df["tag"])

print(vocabulary)
9. 데이터 준비
def prepare_all_videos(df, root_dir):
    num_samples = len(df)
    video_paths = df["video_name"].values.tolist()
    labels = df["tag"].values
    #labels = labels.numpy()

    # `frame_masks` and `frame_features` are what we will feed to our sequence model.
    # `frame_masks` will contain a bunch of booleans denoting if a timestep is
    # masked with padding or not.
    frame_masks = np.zeros(shape=(num_samples, MAX_SEQ_LENGTH), dtype="bool")
    frame_features = np.zeros(
        shape=(num_samples, MAX_SEQ_LENGTH, NUM_FEATURES), dtype="float32"
    )

    # For each video.
    for idx, path in enumerate(video_paths):
        # Gather all its frames and add a batch dimension.
        frames = load_video(os.path.join(root_dir, path))
        frames = frames[None, ...]

        # Initialize placeholders to store the masks and features of the current video.
        temp_frame_mask = np.zeros(shape=(1, MAX_SEQ_LENGTH,), dtype="bool")
        temp_frame_features = np.zeros(
            shape=(1, MAX_SEQ_LENGTH, NUM_FEATURES), dtype="float32"
        )

        # Extract features from the frames of the current video.
        for i, batch in enumerate(frames):
            video_length = batch.shape[0]
            length = min(MAX_SEQ_LENGTH, video_length)
            for j in range(length):
                temp_frame_features[i, j, :] = feature_extractor.predict(
                    batch[None, j, :]
                )
            temp_frame_mask[i, :length] = 1  # 1 = not masked, 0 = masked

        frame_features[idx,] = temp_frame_features.squeeze()
        frame_masks[idx,] = temp_frame_mask.squeeze()

    return (frame_features, frame_masks), labels


train_data, train_labels = prepare_all_videos(train_df, "/content/drive/MyDrive/ColabNotebooks/train")
test_data, test_labels = prepare_all_videos(test_df, "/content/drive/MyDrive/ColabNotebooks/test")

print(f"Frame features in train set: {train_data[0].shape}")
print(f"Frame masks in train set: {train_data[1].shape}")
print(train_labels)
print(test_labels)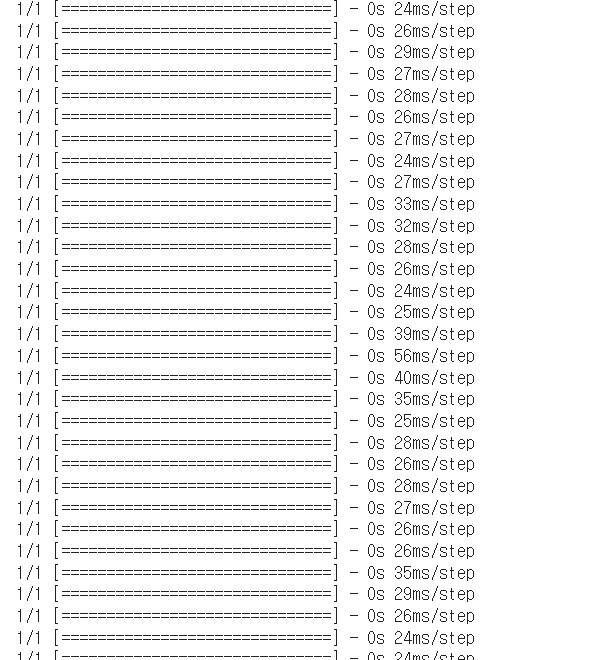
데이터 셋을 생성하고 Inception V3 모델을 거친다
돌리는 데 너무 오래 걸린다... 이것 때문에 코랩 pro 결제했다ㅠㅠ
10. 라벨 값 변경
train_np_array = train_labels
test_np_array = test_labels

train_np_array = np.array([0 if label == 1 else 1 if label == 2 else 2 if label == 11 else 3 if label == 13 else 4 if label == 21 else 5 if label == 106 else 6 if label == 110 else 7 if label == 111 else None for label in train_np_array])
test_np_array = np.array([0 if label == 1 else 1 if label == 2 else 2 if label == 11 else 3 if label == 13 else 4 if label == 21 else 5 if label == 106 else 6 if label == 110 else 7 if label == 111 else None for label in test_np_array])
라벨 값을 0부터 7까지로 변경하였다
11. 시퀀스 모델
# Utility for our sequence model.
def get_sequence_model():
    class_vocab = vocabulary

    frame_features_input = keras.Input((MAX_SEQ_LENGTH, NUM_FEATURES))
    mask_input = keras.Input((MAX_SEQ_LENGTH,), dtype="bool")

    # Refer to the following tutorial to understand the significance of using `mask`:
    # https://keras.io/api/layers/recurrent_layers/gru/
    x = keras.layers.GRU(16, return_sequences=True)(
        frame_features_input, mask=mask_input
    )
    x = keras.layers.GRU(8)(x)
    x = keras.layers.Dropout(0.4)(x)
    x = keras.layers.Dense(8, activation="relu")(x)
    output = keras.layers.Dense(len(class_vocab), activation="softmax")(x)

    rnn_model = keras.Model([frame_features_input, mask_input], output)

    rnn_model.compile(
        loss="sparse_categorical_crossentropy", optimizer="adam", metrics=["accuracy"]
    )
    return rnn_model


# Utility for running experiments.
def run_experiment():
    filepath = "/tmp/video_classifier"
    checkpoint = keras.callbacks.ModelCheckpoint(
        filepath, save_weights_only=True, save_best_only=True, verbose=1
    )

    seq_model = get_sequence_model()

    # learning rate을 바꾸기 위해 optimizer를 새로 생성함
    opt = keras.optimizers.Adam(learning_rate=0.0001)

    # 모델 컴파일하기
    seq_model.compile(
        loss="sparse_categorical_crossentropy", optimizer=opt, metrics=["accuracy"]
    )

    history = seq_model.fit(
        [train_data[0], train_data[1]],
        train_np_array,
        validation_data=(val_data, val_labels),
        epochs=EPOCHS,
        callbacks=[checkpoint],
    )

    seq_model.load_weights(filepath)
    _, accuracy = seq_model.evaluate([test_data[0], test_data[1]], test_np_array)
    print(f"Test accuracy: {round(accuracy * 100, 2)}%")

    return history, seq_model


_, sequence_model = run_experiment()
RNN 모델을 구축하고 모델을 학습시킨다!
12. 추론
def prepare_single_video(frames):
    frames = frames[None, ...]
    frame_mask = np.zeros(shape=(1, MAX_SEQ_LENGTH,), dtype="bool")
    frame_features = np.zeros(shape=(1, MAX_SEQ_LENGTH, NUM_FEATURES), dtype="float32")

    for i, batch in enumerate(frames):
        video_length = batch.shape[0]
        length = min(MAX_SEQ_LENGTH, video_length)
        for j in range(length):
            frame_features[i, j, :] = feature_extractor.predict(batch[None, j, :])
        frame_mask[i, :length] = 1  # 1 = not masked, 0 = masked

    return frame_features, frame_mask


def sequence_prediction(path):
    class_vocab = vocabulary

    frames = load_video(os.path.join("/content/drive/MyDrive/ColabNotebooks/test", path))
    frame_features, frame_mask = prepare_single_video(frames)
    probabilities = sequence_model.predict([frame_features, frame_mask])[0]

    for i in np.argsort(probabilities)[::-1]:
        print(f"  {class_vocab[i]}: {probabilities[i] * 100:5.2f}%")
    class_name = class_vocab[probabilities.argmax(axis=-1)]
    class_probabilities = probabilities[probabilities.argmax(axis=-1)] * 100
    print(class_probabilities)
    return frames, class_name


# This utility is for visualization.
# Referenced from:
# https://www.tensorflow.org/hub/tutorials/action_recognition_with_tf_hub
def to_gif(images):
    converted_images = images.astype(np.uint8)
    imageio.mimsave("animation.gif", converted_images, fps=10)
    return embed.embed_file("animation.gif")


test_video = np.random.choice(test_df["video_name"].values.tolist())
print(f"Test video path: {test_video}")

test_frames, test_class = sequence_prediction(test_video)
print(test_class)
#to_gif(test_frames[:])
새로 들어온 영상으로 데이터 셋을 생성하고 Inception V3 모델을 거친다
그 후 결과를 확인할 수 있다
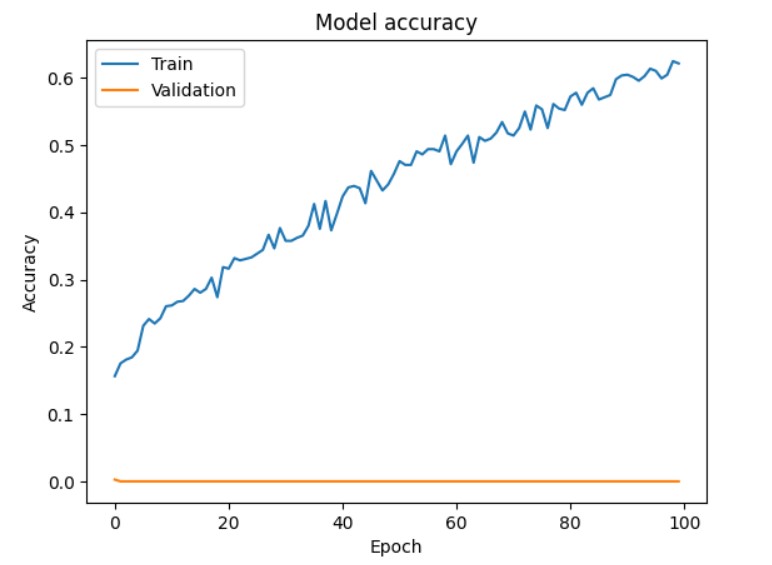
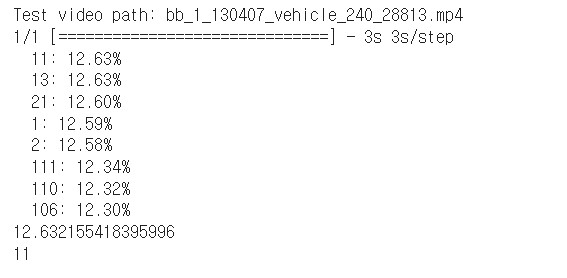
하지만 정확도가 너무 낮았다.....
▶ 정확도를 높이기 위해 한 방법들
1. 데이터 수 늘리기
데이터 수가 너무 적은 것 같아
각 항목마다 데이터 수를 기존 100개에서 200개로 늘리기로 하였다
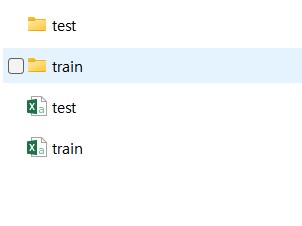
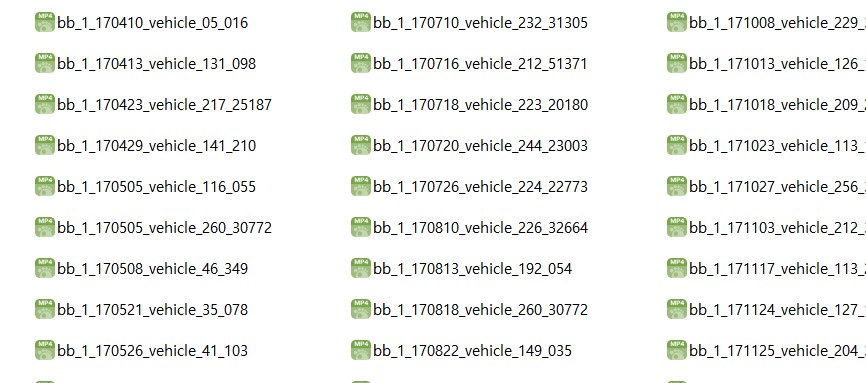
※데이터 예시
200개를 train 데이터 160개, test 데이터 40개로 나눔
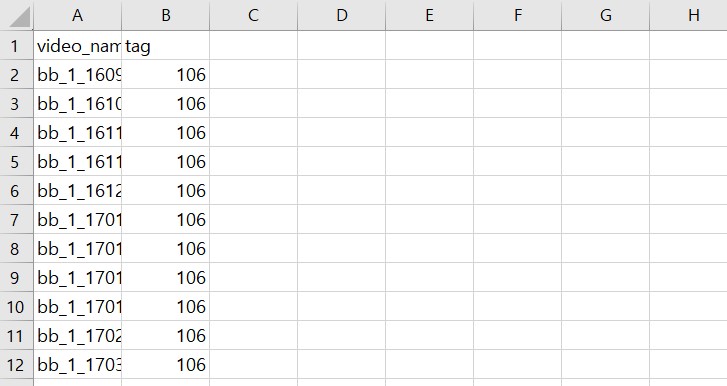
video_name과 tag를 라벨링한 csv 파일도 준비
2. MAX_SEQ_LENGTH 변경
MAX_SEQ_LENGTH : 입력 시퀀스의 최대 길이를 제한
MAX_SEQ_LENGTH의 값은 모델 구성 및 하드웨어 성능과 상호작용하여 결정된다
일반적으로 값이 클수록 더 많은 정보를 제공하지만, 더 많은 메모리 및 계산 리소스를 필요로 한다
따라서 MAX_SEQ_LENGTH 값을 변화시키면서 최적의 모델 성능을 얻을 수 있음!!
3. validation 추가
train : 모델을 학습하기 위한 데이터셋
test : 학습과 검증 완료된 모델의 성능을 평가하기 위한 데이터셋
원래는 train과 test 데이터셋만 사용했다
train에 사용한 테이터를 검증용으로 사용하면 제대로 된 검증을 할 수 없기 때문에 validation 데이터를 이용하였다
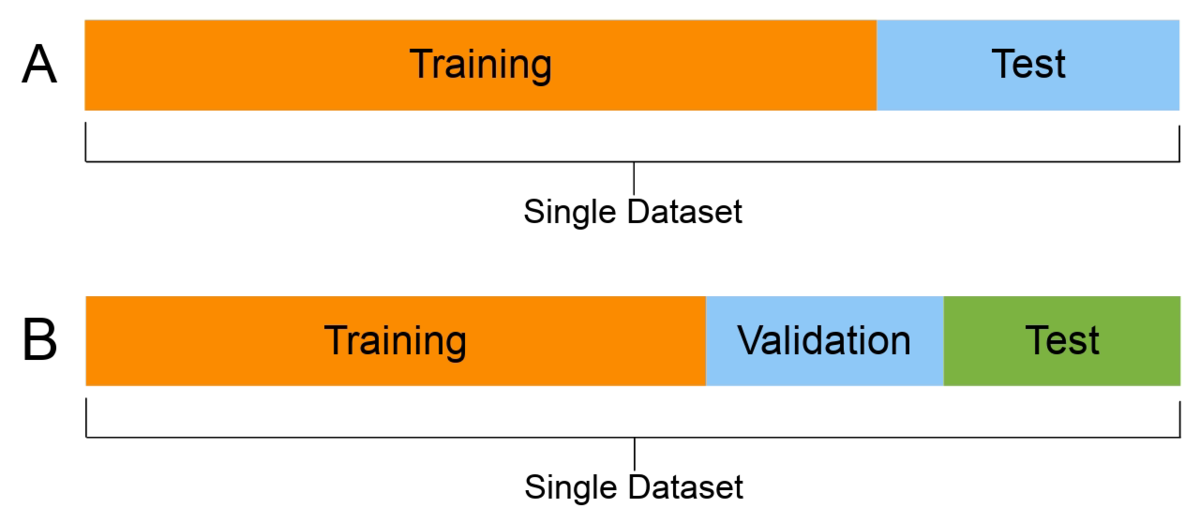
validation : 학습이 완료된 모델을 검증하기 위한 데이터셋
※ validation set 추가하는 방법
train_test_split 함수를 이용하면 간단하게 데이터를 분할할 수 있다
from sklearn.model_selection import train_test_split

train_masks, val_masks, train_features, val_features, train_labels, val_labels = train_test_split(train_data[0], train_data[1], train_labels, test_size=0.3, random_state=42, shuffle= True)
test_size : test 데이터셋의 비율 (0.3은 비율이 7:3을 의미)
random_state : seed 값 (수행 시 결과값을 동일하게 맞춰줌)
shuffle : 셔플 여부
너무 많이 학습을 시키면 overfitting 될 수 있기 때문에 validation set을 사용해 적절한 epoch 값을 찾을 수 있다!
참고 문서 : https://keras.io/examples/vision/video_classification/
'Deep Learning > CV' 카테고리의 다른 글
| [boostcourse] 3. Seg&Det - Semantic Segmentation (0) | 2024.06.17 |
|---|---|
| [boostcourse] 2. 컴퓨터 비전과 딥러닝 - 영상 인식의 이해 (2) | 2024.06.12 |
| [boostcourse] 2. 컴퓨터 비전과 딥러닝 - 데이터 부족 문제 완화 (1) | 2024.06.11 |
| [boostcourse] 1. 컴퓨터 비전의 시작 (2) | 2024.06.11 |
| Google Colab을 이용한 YOLOv5 Custom 데이터 학습 (1) | 2022.11.25 |


